Stock Tracker 5
Stock Tracker 5 Home


Using Stock Tracker 5
All Documentation
Getting Started
Operator Login
Overview
Adding Items
Selling Items
Managing Contacts
Reference
Client Options
Administration Area
Printing
Client Software Setup
Setup Connection to Database
Server Setup
Setup SQL Server and Import Data
Setup Stock Tracker Server App
Setup Postcode Database (optional)
Setup Server Backup

Stock Tracker 5 Scripting
Scripting

Known Issues
PST5 Known Issues

Managing Contacts

Introduction

Palace Stock Tracker stores all contacts centrally, all addresses used in items, invoices and drops and are "linked" to a contact.

This means:

About Addresses

Palace Stock Tracker allows multiple addresses to be added under each contact so if a contact moves house any historical related data remains unchanged while still providing a link to that contact.

 Tip: Altering an address because somebody has moved is a very bad idea! The software will warn you if you attempt to do this and suggest that you add a new address under the same contact instead.

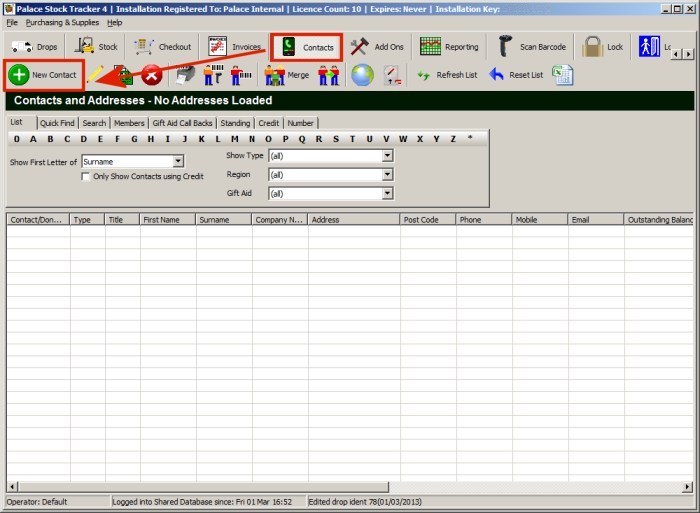
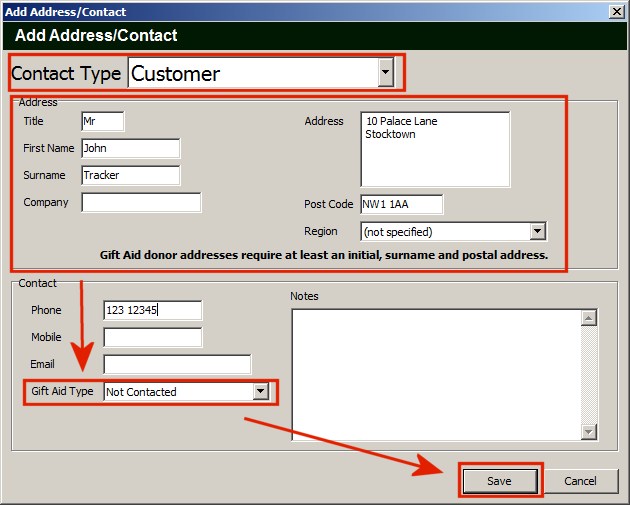
Adding a New Contact


Finding a Specific Contact

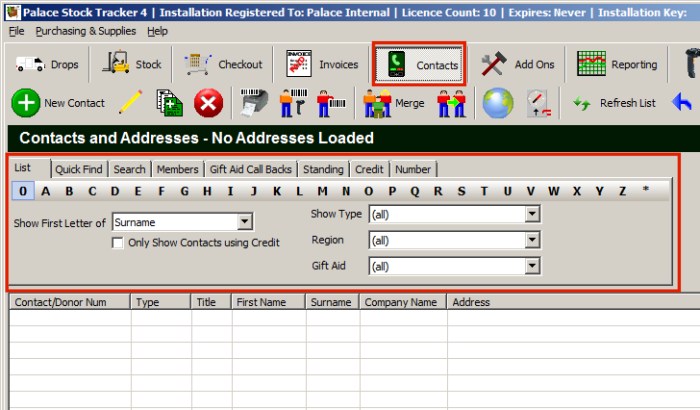
Contacts can be found using the tabs along the top within the Contacts area.


Find a Contact using The List Tab


Find a Contact using the Quick Find Tab

Note: If you are searching for a new contact it may be necessary to refresh the Quick find data by pressing the Refresh Now button before the contact appears in the results.

 Tip: You can search in other fields too (not just the name) by changing the value in the Search Within drop down box.

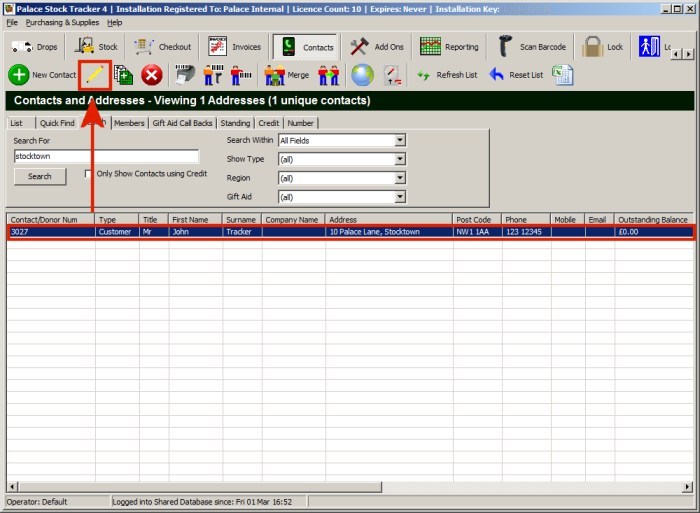
Find a Contact using the Search Tab

 Tip: For large result sets you can refine which fields are searched by changing the value in the Search Within drop down box.

Find a Contact using the Contact/Donor Number Tab

If you know a contact's contact/donor number, type it into the Contact/Donor Number box and press Find.


Editing or Viewing a Contact's Details

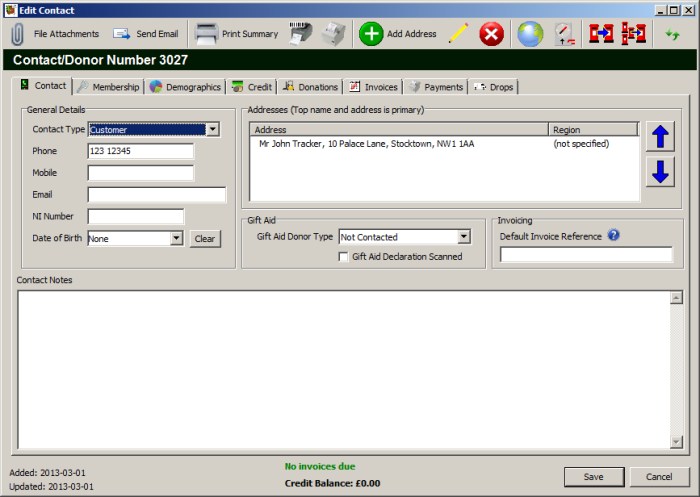
The contact's record will now be displayed showing basic details in the top left corner and a list of addresses over to the right. Any notes for this contact can be entered in the large Contact Notes text box.

Where a contact has more than one address the top address is considered their primary/current address. Previous addresses would normally only exist to preserve any links to existing data elsewhere in the system.


Changing the Primary Address

For contacts with multiple addresses the primary address should be at the top of the addresses list. To move another address to the top of the list:


Merging Addresses

If a contact has two or more addresses that are clearly the same (but just typed in slightly different ways) they can be merged into a single address.


Adding a New Address


Edit and Existing Address

Note: Do not alter an address if a contact has moved, add a new address instead to preserve existing linked data elsewhere.

Delete an Address

All contacts require at least one address, therefore only non-primary addresses can be deleted.

Note: Deleting an address which is referenced from elsewhere in the system will result in those links being removed and cannot be undone.

Credit Tab

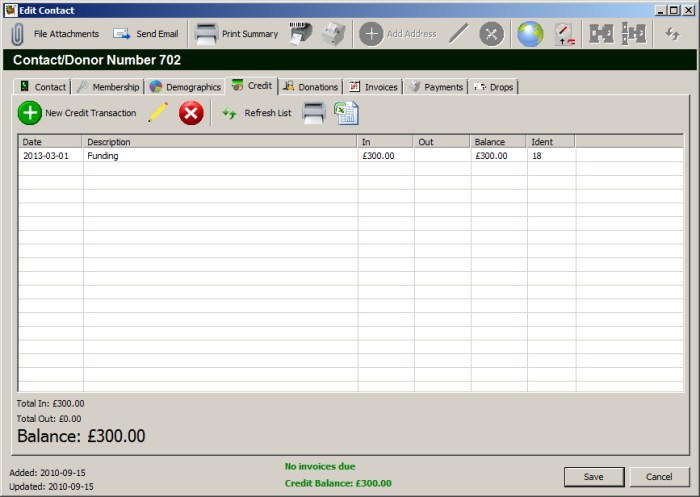
Credit works like a mini bank account for contacts. This is designed for use with funded customers but could be used in other situations too.

Use the New Credit Transaction button to create transactions to add or withdraw funds.

 Tip: When selling items it is possible to deduct the balance directly from the purchasing contact's credit account while creating or editing invoices.

Donations Tab

The Donations tab contains a list of all items supplied (or donated) by the contact. Double clicking the entries in the list allows each item to be viewed/edited directly.


Invoices Tab

The Invoices tab contains a list of every invoice made out to the contact. Double clicking the entries in the list allows each invoice to be viewed/edited directly.


File Attachments

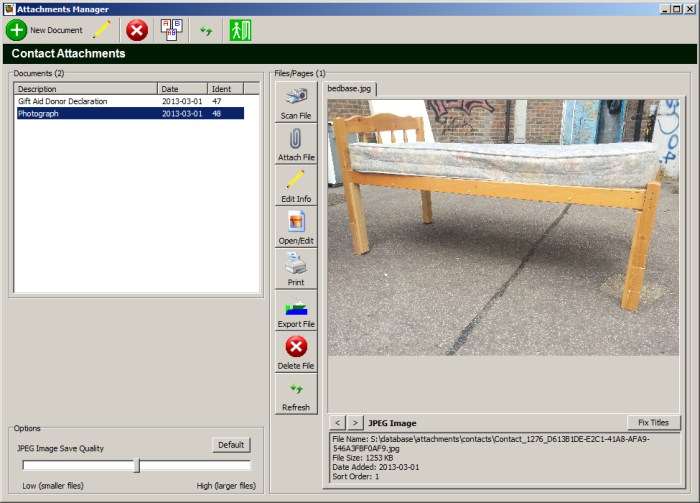
Each contact can have files attached to their record. Although this feature has been created to store evidence of Gift Aid declaration forms and letters being sent to donors it can be used freely to store any type of file.

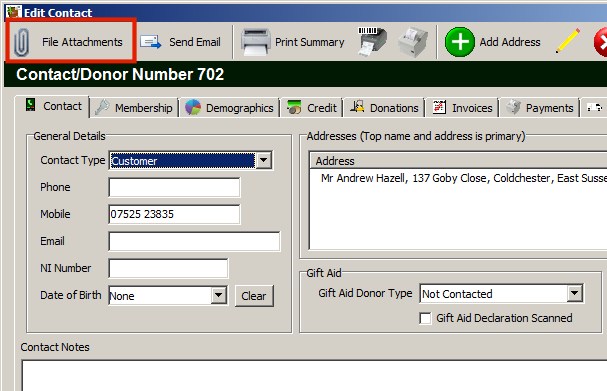
Use the File Attachments toolbar button to access a contact's file attachments.

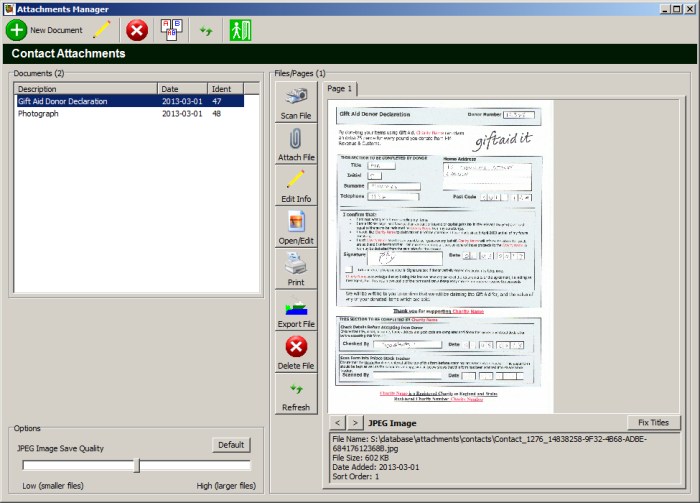
When files are imported into the Attachments Manager they are copied from their original source and stored in the Palace Stock Tracker central data root marked as read-only.

The same applies to images which may be scanned directly from a scanner or captured from a webcam.

Copies of file attachments can be exported at any time. All attachments can be opened using their associated application (in read only mode) with a single click, some file formats can be printed directly from the Attachments Manager.

Attachments can be any type of file (i.e. Word documents, PDF files, images, any custom files etc).


Example Scanned Document Attachment


Example Image Attachment


 Contents
 Top